Every year, thousands of American homeowners and real estate investors find themselves facing one of the most stressful letters a municipality can deliver: a City Code Enforcement Notice of Violation or Stop-Work Order for unpermitted construction.
Alternatively, the realization strikes during a home refinance or resale: a licensed appraiser measures the house, compares it against public tax assessor records, and discovers that the 450 sq ft master suite, finished walk-out basement, or converted accessory garage was built without municipal permits.
Under standard underwriting guidelines (Fannie Mae, Freddie Mac, FHA, and VA), unpermitted square footage cannot be counted toward official Gross Living Area (GLA). A buyer's lender may deny financing, title insurance will flag non-permitted improvements, and the city may threaten daily escalating fines.
The immediate panic for most property owners is: "Will the city make me demolish the addition down to bare dirt?"
The reassuring reality is: in over 95% of cases, no. Municipal building departments vastly prefer bringing unpermitted residential structures into legal compliance through retroactive permitting (As-Built Legalization) rather than issuing demolition orders.
Here is an authoritative architectural and engineering roadmap detailing how to document, draft, inspect, and legalize unpermitted residential construction under the International Residential Code (IRC) and local municipal standards.
1. The 6-Step As-Built Legalization Workflow
Legalizing non-permitted space requires converting an existing, enclosed physical structure into a fully documented permit set that satisfies modern life-safety codes.
| Step & Phase | Stage Objective | Field & Drafting Action | Deliverable for Building Dept |
|---|---|---|---|
| Step 1: Archive Audit | Establish legal permitted baseline | Pull historical building cards, microfiche records, and prior permits from the municipal portal | Baseline property record and existing legal footprint |
| Step 2: As-Built Survey | Capture physical reality | Laser-measure interior room geometry, wall thicknesses, window/door openings, and MEP fixture drops | Measured existing floor plans, elevations, and structural layout |
| Step 3: Surgical Openings | Verify concealed structural assemblies | Cut non-destructive 6-inch inspection holes at wall studs, foundation footings, and ceiling joists | Documented framing sizes, lumber grade, and footing depth verification |
| Step 4: Code & Load Calcs | Validate structural and electrical safety | Run IRC gravity beam load calculations and NEC Article 220 electrical panel capacity checks | Engineered framing capacity reports and panel schedule verification |
| Step 5: Plan Check Filing | Formal permit set submittal | Submit full 24x36 drawing package (Cover, Site, Arch, Structural, MEP) with code compliance matrix | Official municipal plan check submittal package |
| Step 6: Field Verification | Close open code violations | Municipal building inspector conducts rough/final inspections and closes code cases | Certificate of Occupancy (C.O.) and legal clear title |
Step 1: Municipal Archive Audit
Before hiring a contractor or opening walls, visit your local building department (or access their online permit records portal). Request the original approved architectural plans, building cards, and permit history for the parcel.
- This establishes your baseline legal footprint.
- You will know precisely what was permitted originally (e.g., "Original 1,200 sq ft single-story dwelling, 1964") versus what was added later without sign-off.
Step 2: Measured As-Built Architectural Drafting
The city will not accept rough sketches or hand-drawn notes. You must submit a professional, dimensioned set of As-Built CAD drawings showing:
- The property boundary, zoning setbacks, and lot coverage.
- The existing permitted structure versus the non-permitted addition.
- Complete architectural floor plans, exterior elevations, foundation details, and electrical branch layouts.
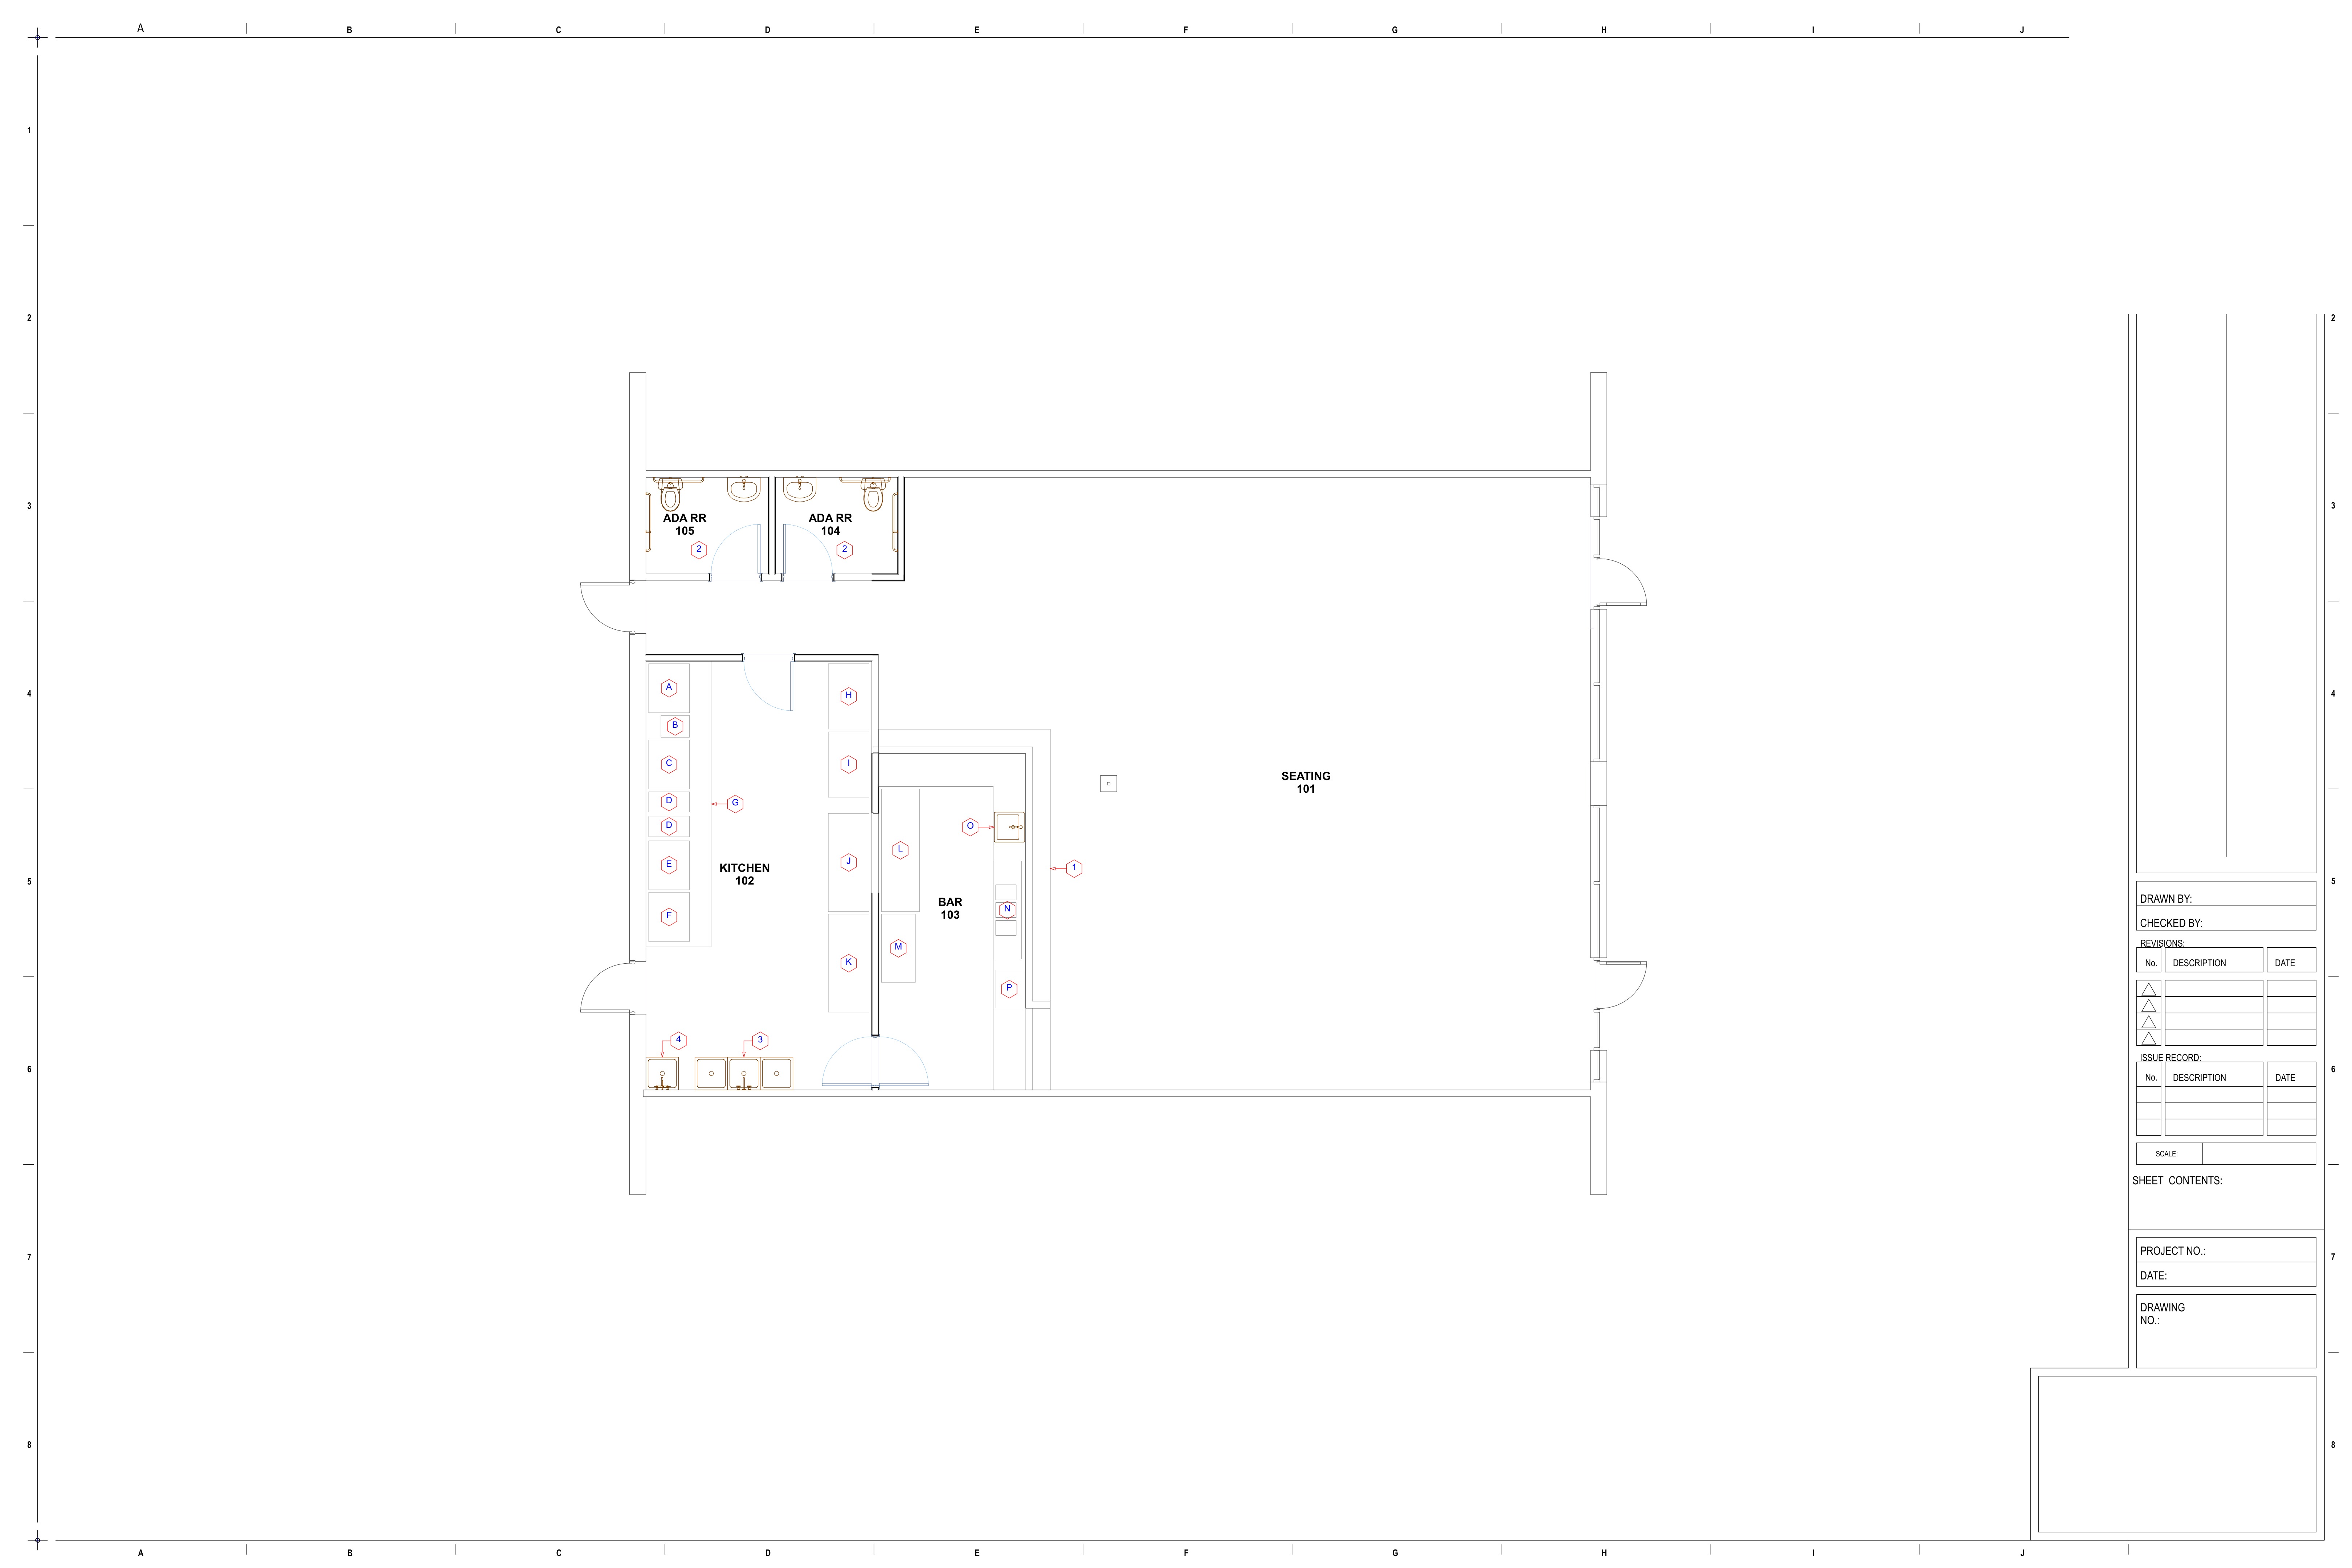
Figure 1: Authentic CAD as-built floor plan drafted from on-site laser measurements, depicting exact wall thicknesses, door swings, window sill heights, and room square footage callouts.
Step 3: Targeted Destructive Investigation (Special Inspections)
Because the building inspector was not present when the foundation was poured or the wall studs were sheetrocked, they cannot see hidden construction.
- Rather than gutting the entire room, a licensed structural engineer or special inspector directs "surgical test openings" (typically small 6" x 6" drywall cutouts).
- These allow visual verification of:
- Wall stud spacing (2x4 or 2x6 at 16" on-center).
- Header sizing over doors and windows.
- Anchor bolt spacing into the concrete foundation.
- Ceiling joist spans and roof rafter tie-ins.
Step 4: Structural & MEP Engineering Calculations
If the addition added significant square footage, a structural engineer must stamp calculations verifying that roof framing, foundation bearing, and lateral shear walls comply with current snow, wind, and seismic loads.
Similarly, an NEC 220 electrical load calculation is required to verify that the existing main electrical service panel (100A or 200A) is not overloaded by the new circuits. You can test your service capacity for free using our NEC 220 Electrical Panel Schedule Calculator.
Step 5: Municipal Plan Check Submittal
Your completed drawing package is submitted for formal plan check. Reviewers across Planning/Zoning, Building, Fire, and Health/Environmental will review the drawings. Plan comments are resolved using formal transmittal response letters (see our Plan Check Response Letter Guide).
Step 6: Targeted Field Inspections & Certificate of Occupancy
Once plans are approved and the permit is pulled, a city building inspector conducts on-site inspections:
- Inspects the surgical test openings to confirm framing matches the submitted drawings.
- Checks smoke and carbon monoxide detector placement.
- Verifies emergency egress window clear openings.
- Issues the final Certificate of Occupancy (C.O.) or Certificate of Completion, updating the tax assessor records to legal living area.
2. Drawing Deliverables Checklist: What City Reviewers Demand
When preparing an as-built legalization drawing package, municipal examiners scrutinize specific code sheets:
| Sheet Number | Drawing Title | Critical Mandatory Callouts for Unpermitted Space |
|---|---|---|
| A0.0 / T-1 | Title Sheet & Code Matrix | Governing building code year (IRC, CBC, NEC), scope narrative ("Legalization of Existing 420 Sq Ft Rear Addition"), zoning setback verification, and vicinity map. |
| SP-1 | Site Plan & Zoning Setbacks | Clear dimensioned distances from the unpermitted addition to rear and side property lines. Must prove the addition does not encroach into mandatory zoning setbacks or easements. |
| A1.0 | As-Built Floor Plan | Dimensioned room layout, clear identification of existing legal vs. unpermitted walls, ceiling heights, door rough openings, and room use labels (e.g. "Bedroom", "Family Room"). |
| A2.0 | Exterior Elevations | All four building facades showing existing vs. new finishes, window head heights, roof pitches, and clearance from exterior grade to siding (minimum 6" clearance). |
| S1.0 | Foundation & Framing Plan | Footing width and embedment depth, concrete slab thickness, anchor bolt size and spacing, wall stud sizes, window header dimensions, and roof rafter spans. |
| E1.0 | Electrical & Life Safety | Receptacle spacing (IRC E3901: maximum 12 ft between outlets), dedicated 20A branch circuits, AFCI breaker protection, and hardwired interconnected smoke/CO alarms. |
| M1.0 / P1.0 | HVAC & Plumbing (If Applicable) | Heating verification (habitable rooms must be maintainable at minimum 68°F), bathroom fixture clearances, DWV plumbing schematics, and ventilation exhaust CFM. |
3. The 4 Most Common IRC Code Deficiencies (and How to Fix Them)
Most unpermitted additions built by previous homeowners or unlicensed handymen suffer from common code shortcuts. Here is how our drafting studio and engineering partners resolve them without tearing down walls:
1. Ceiling Height Clearances (IRC Section R305)
- The Code Mandate: Habitable rooms, hallways, and basements must have a clear ceiling height of not less than 7 feet 0 inches (6'-8" permitted under beams, girders, and ducts).
- Common Violation: An unpermitted basement finish or enclosed patio with ceiling heights measuring 6'-6" or 6'-8".
- The Solution: If floor-to-ceiling framing cannot be raised, the room may need to be designated as "Storage / Utility / Den" rather than a legal sleeping bedroom, which has stricter ceiling and egress mandates under the IRC.
2. Emergency Escape & Rescue Openings (IRC Section R310)
- The Code Mandate: Every sleeping room (bedroom) must have at least one operable emergency escape and rescue window opening directly to the exterior:
- Minimum net clear opening: 5.7 sq ft (5.0 sq ft for grade-floor windows).
- Minimum clear opening height: 24 inches.
- Minimum clear opening width: 20 inches.
- Maximum sill height: 44 inches above finished floor.
- Common Violation: Small sliders or fixed hopper windows that prevent emergency firefighter entry or occupant exit.
- The Solution: Retrofit an egress window by enlarging the rough opening horizontally or vertically. On wood-frame walls, this is an economical 1-day framing adjustment.
3. Foundation Footing Depth & Anchor Bolts (IRC R403 & R404)
- The Code Mandate: Exterior walls must be supported on continuous concrete footings extending below the local frost line (12" to 48" depending on geographic climate) and anchored with minimum 1/2-inch steel anchor bolts embedded 7 inches into concrete at maximum 6 feet on-center.
- Common Violation: A former covered porch or patio slab was framed on a thin 3-inch unreinforced concrete slab without stem footings or anchor bolts.
- The Solution: An engineer may specify epoxy-grouted anchor bolts (e.g. Simpson Strong-Tie Titan HD anchors) installed through the bottom wall plate, or small exterior underpin concrete pier footings at corners to satisfy gravity and uplift loads.
4. Electrical AFCI/GFCI & Panel Sizing (NEC 210.8 & 210.12)
- The Code Mandate: All 120-volt single-phase 15- and 20-ampere branch circuits supplying outlets in dwelling unit bedrooms, living rooms, and dens must be protected by an Arc-Fault Circuit-Interrupter (AFCI). Bathrooms, kitchens, and outdoor receptacles require Ground-Fault Circuit-Interrupters (GFCI).
- The Solution: Swap existing standard circuit breakers inside the main panel for modern dual-function AFCI/GFCI breakers. Verify panel schedule demand loads using our Electrical Panel Schedule Tool.
4. Cost Breakdown: Legalizing vs. Property Value Lost
Many homeowners hesitate to legalize unpermitted space because of feared permit penalties. However, comparing the one-time legalization cost against the permanent loss in home equity reveals why legalization is one of the highest-ROI investments you can make:
| Expense Category | Typical Cost Range | What It Covers |
|---|---|---|
| As-Built Measured Drafting | $1,500 – $2,800 | Full architectural, structural, and MEP permit drawing set prepared to municipal drafting standards. |
| Structural / MEP Engineering Review | $800 – $1,800 | Professional engineer review, test-opening inspection report, and structural/lateral calculation package. |
| City Plan Check & Permit Fees | $1,200 – $3,500 | Standard municipal review fee + standard retroactive penalty surcharge (typically 1.5x to 2x normal permit fees). |
| Minor Contractor Corrections | $500 – $3,000 | Adding AFCI breakers, enlarging an egress window, or retrofitting smoke alarms. |
| TOTAL LEGALIZATION INVESTMENT | $4,000 – $11,000 | Complete legal status, certified Certificate of Occupancy. |
| EQUITY UNLOCKED (400 SQ FT AT $250/SQ FT) | +$100,000 | Converted from zero-value "unpermitted space" to legal Gross Living Area (GLA). |
When an addition is legalized, the square footage is officially recorded on the county property tax roll. During resale or refinancing, that 400 to 600 sq ft adds $80,000 to $180,000 in appraised real estate valuation while removing all legal liability during home inspections.
5. How HearthPlans Accelerates Your As-Built Legalization
At HearthPlans, our senior CAD/BIM drafting team specializes in fast-track permit packages for unpermitted additions, ADU legalizations, and municipal code violation responses across the United States:
- Fast Turnaround: Send us your hand measurements, contractor sketches, or LiDAR smartphone scan, and receive a complete, submission-ready permit drawing set in 3 to 5 business days.
- Multi-Discipline Coordination: We produce architectural plans, structural framing details, and coordinated MEP layouts tailored to your local building department's exact checklist.
- 100% Plan Check Resolution: If the city plan reviewer issues correction comments, our team provides line-by-line drawing updates and formal transmittal response letters until your permit is issued.
Ready to resolve your city redlines or legalize your home addition? Get a guaranteed fixed-fee quote for your permit drawings or contact us directly at admin@hearthplans.com.
Related Engineering Calculators & Permit Services
Coordinate your project drawings with these free interactive engineering calculators or request complete permit-ready drafting sheets from our studio.
Interactive Permit Calculators
NEC 220 Electrical Panel Sizing Calculator
Verify if an existing 100A or 200A residential service can handle an ADU, heat pump, or addition without a costly utility upgrade.
Plumbing Fixture Unit (WSFU/DFU) Sizer
Check if existing water meter and sewer lateral pipe diameter satisfy IPC/UPC code requirements for new bathrooms.
Permit Drafting Services
Permit Drawing Sets for Additions & ADUs
Turnkey architectural, structural, and MEP sets formatted for municipal plan-check submittal with 2 revision rounds included.
Structural Drafting: Framing & Foundations
Continuous footing details, post-tension slabs, shear wall schedules, and LVL ridge beam callouts for city submittal.